Code bases
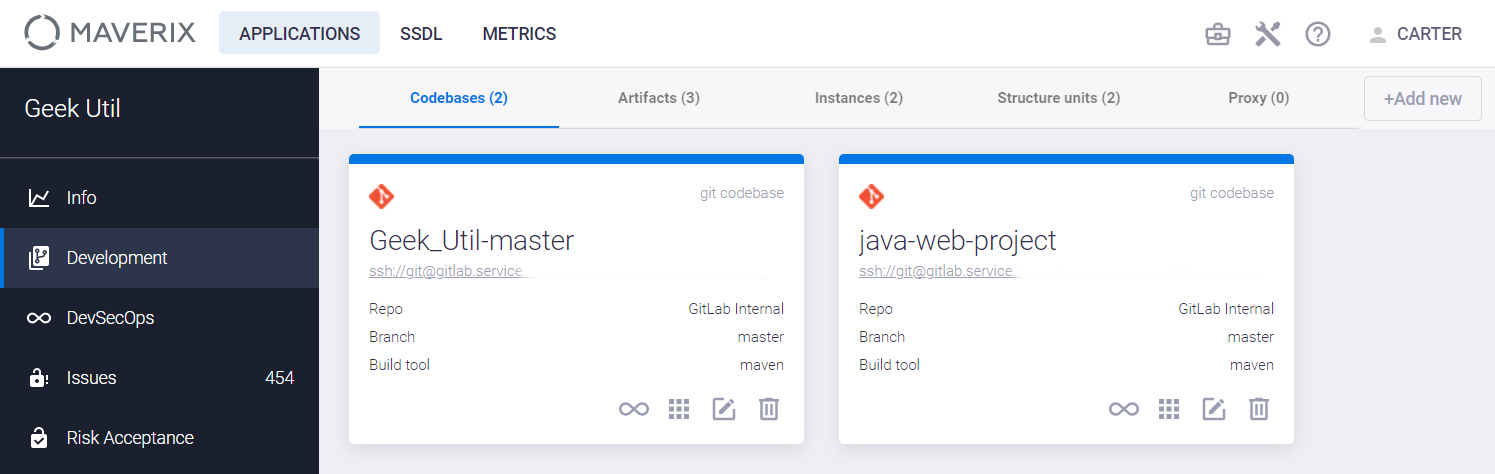
The application isn’t limited to just one code base, but can include several ones. For example, one application can have different code repositories for development and release purposes (<application-dev> and <application-release>) with different source code metrics, different defect metrics, etc.
Click the Development menu item and the +Add new button at the top right of the Codebases tab to add a new code repository. The Create codebase window appears.
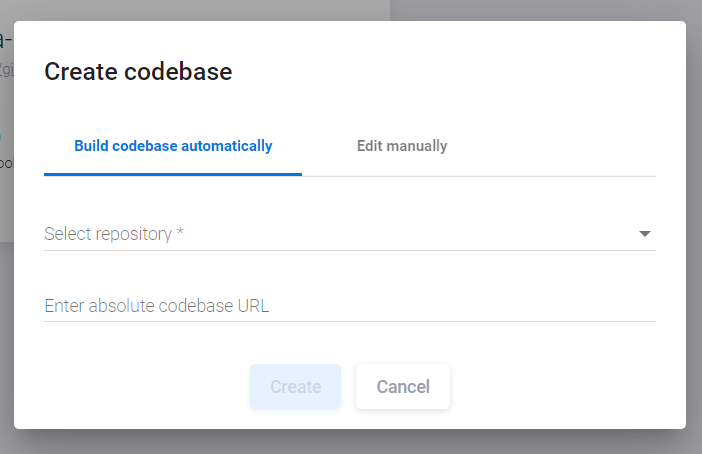
Specify the following parameters of code base:
- Select the type of repository (e.g., VCS_Bitbucket) from the Select Repository drop-down menu.
- Specify the absolute codebase URL for the VCS repository in the Enter absolute codebase URL field.
After entering the specified parameters, the code base will be automatically recognized. If necessary, update the additional fields that appear.

- The VCS type is the type of Version Control System.
- The Auth method is the way of authentication. For Bitbucket, please, select login_password.
- The Code base name is the name of the codebase in Maverix.
- The Code base checkout URL field contains the exact code repository URL for the application. It’s recommended to copy-paste this URL from the repository tool.
- The Branch filter is the filter of code base branches. This field supports the use of masks, for example, if you specify the "feature_*" value, all branches with the "feature_" prefix will be selected.
- Build tool field defines the tool used to work with the code repository (Maven in this example).
| In the branch name you can use the "*" symbol as a universal character, replacing one or more characters. For example, the "feature/*" branch name allows you to use this codebase card for work with all the feature branches in the codebase. |
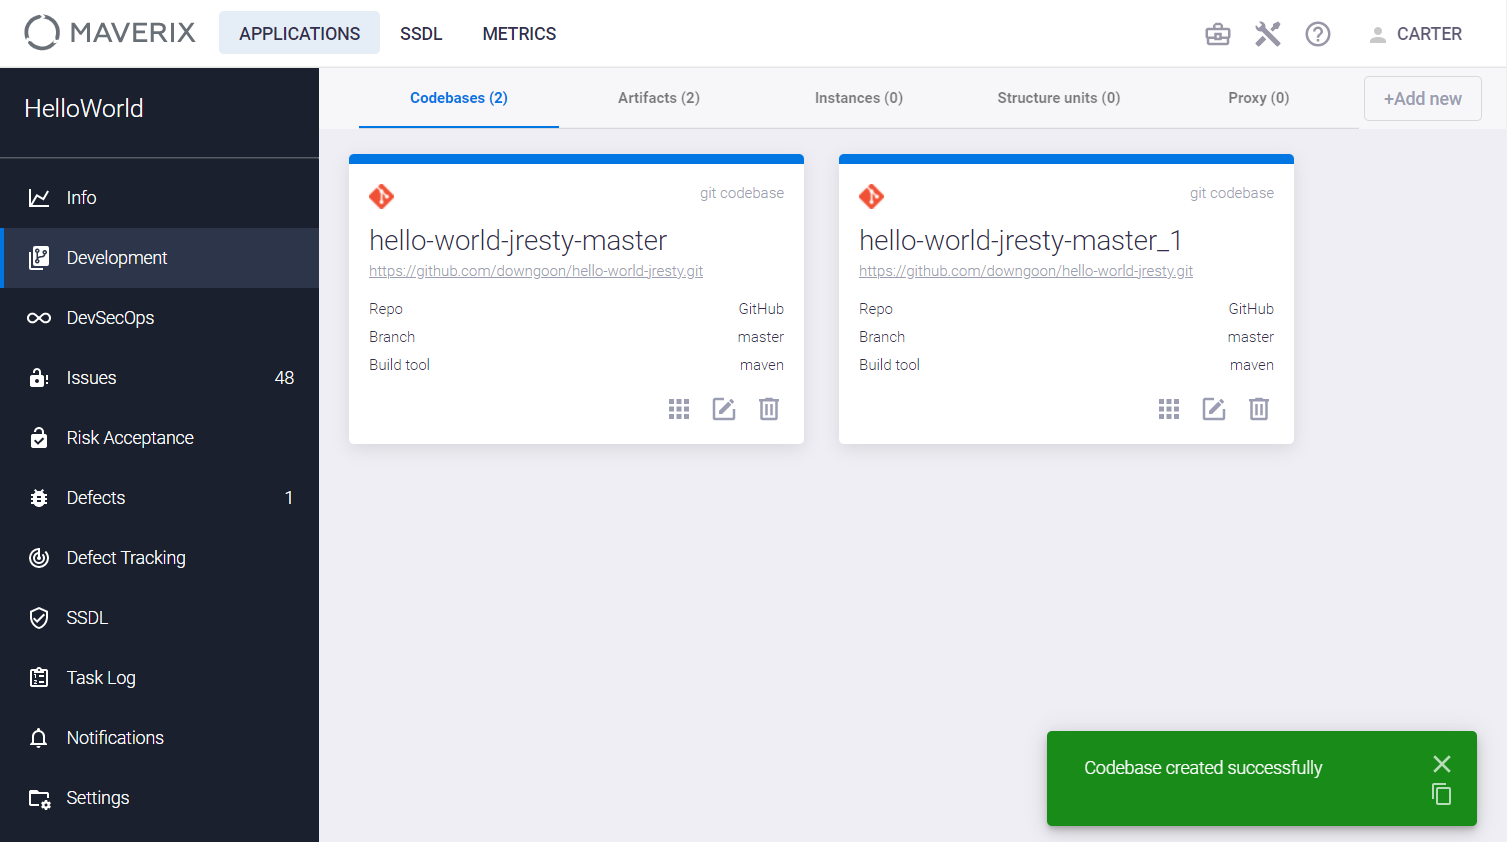
Click the Create button to create a new codebase in Maverix.
The new codebase card appears, along with a confirmation notification at the right bottom.
To configure an existing codebase, click the edit ![]() icon in its card. The Update codebase window appears.
icon in its card. The Update codebase window appears.
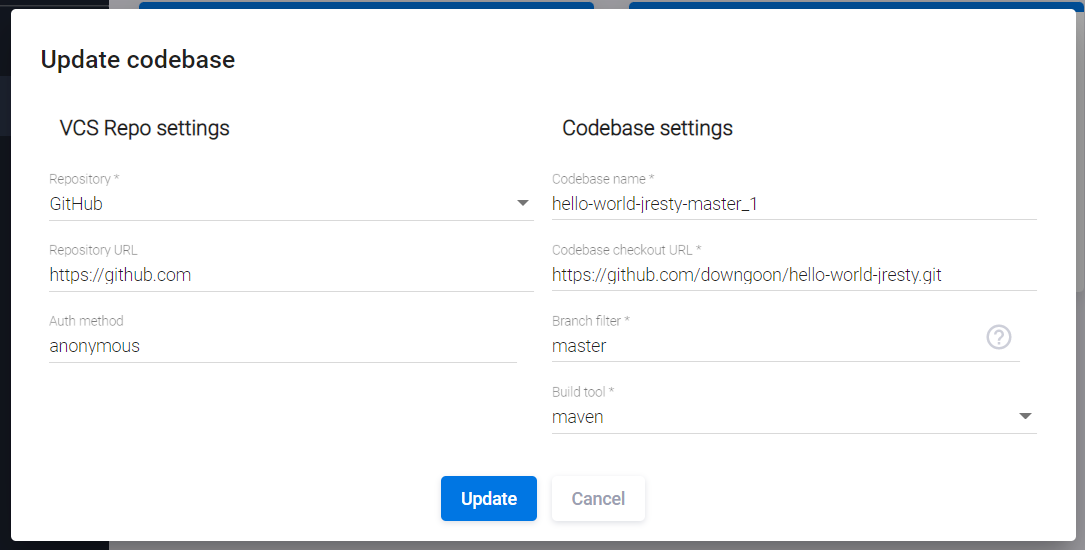
Update the code base parameters as described above and click the Update button.