Sync with Jira
 |
The Manager role is required to perform the actions described below. |
Each defect in Maverix has a status that shows its current stage in the defect life cycle (Registered, Open, In Progress, Fixed, Rejected, Closed). On the other hand, the defect also has its status in Jira. The defect life cycle and the list of defect statuses in Jira are defined by the development team depending on their own workflow. For example, the development team can use the Kanban approach, which has its own defect lifecycle with customized defect statuses. Thus, the lists of defect statuses in Jira and Maverix are different. Therefore, the defect statuses in Maverix should be mapped to the defect statuses in Jira.
The mapping of defect statuses between Maverix and Jira should be defined in Maverix for each application.
Select the Applications menu item at the top left of the Maverix user interface. The applications page appears.
Select the application. Select the Defect tracking menu item on the left.
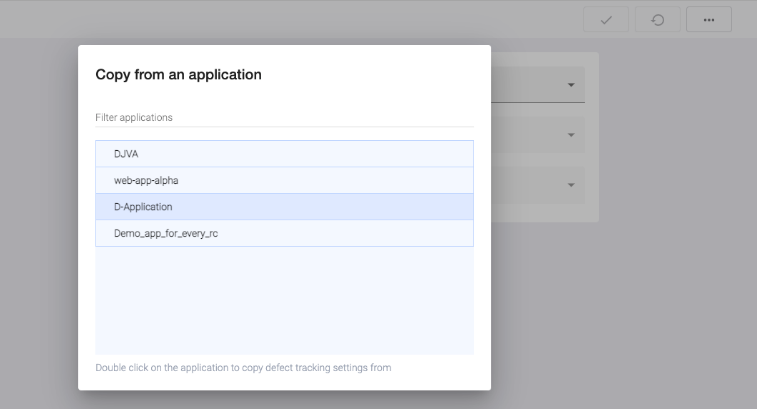
It is possible to copy all the defect tracking settings from another application in Maverix. To do this, click the Actions ![]() button at the top right of the Defect Tracking page and select the Copy config from another app item from the drop-down menu. Select the required application from the list in the Copy from an application window that appears.
button at the top right of the Defect Tracking page and select the Copy config from another app item from the drop-down menu. Select the required application from the list in the Copy from an application window that appears.
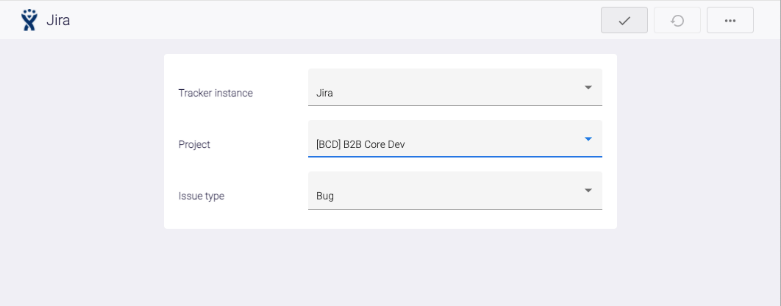
If the settings aren’t copied from another application, select the following values from the drop-down menus on the Defect Tracking page to start the configuration process: Tracker instance (Jira), Project (a project name), and Issue type (Task, Bug, etc.). Click the Create config ![]() button at the top right.
button at the top right.
After that, you can start matching the defect statuses in the fields that appear on the page.
The mapping of defect statuses should be set separately for every combination of values in the Tracker Instance/Project/Issue type fields.
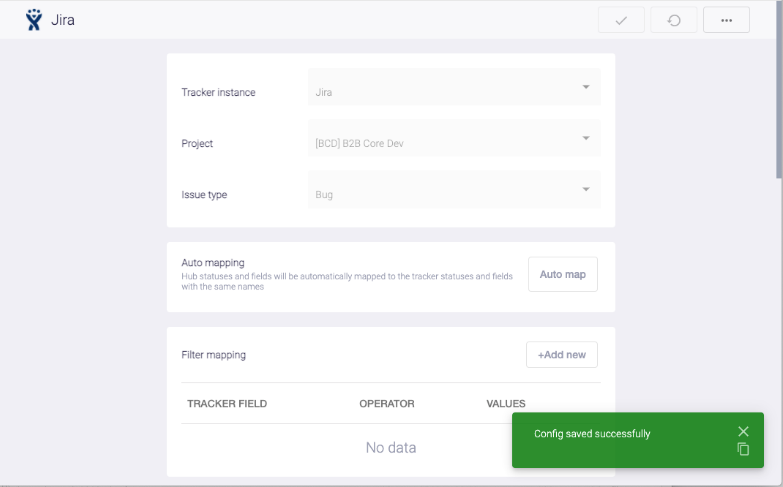
Automatic status mapping
The Auto map button in the Auto mapping section allows you to automatically map statuses and fields if they are exactly the same in Maverix and Jira. It’s reasonable to use this functionality at the beginning of the process of mapping statuses and fields, and then manually adjust the results if needed.

After the automatic mapping of statuses and fields, click the Update config button in the right upper corner of the Defect Tracking page to save the created configuration.
Automatic Filtering of Security Defects
When selecting values in the Tracker Instance/Project/Issue type fields, you should configure the parameters for automatic filtering and synchronization of security defects.
Defects can be synchronized both from Maverix to Jira and from Jira to Maverix. Let’s assume that prior to synchronization with Maverix, Jira already has several project-related none-security development defects. If the synchronization filter filter is not set, all these development defects will be considered by Maverix as security ones, which is really not the case. To prevent this misinterpretation, we need to add a filter and create a rule to distinguish security defects from all other development defects.
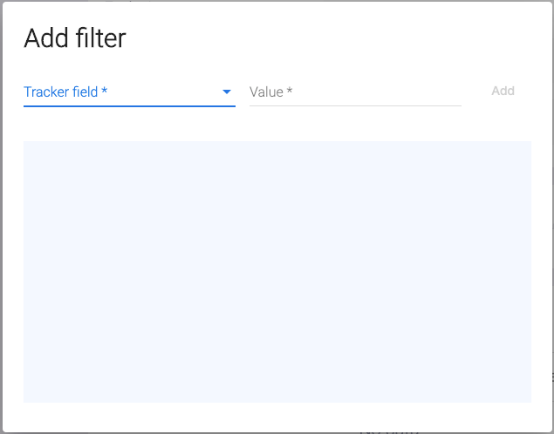
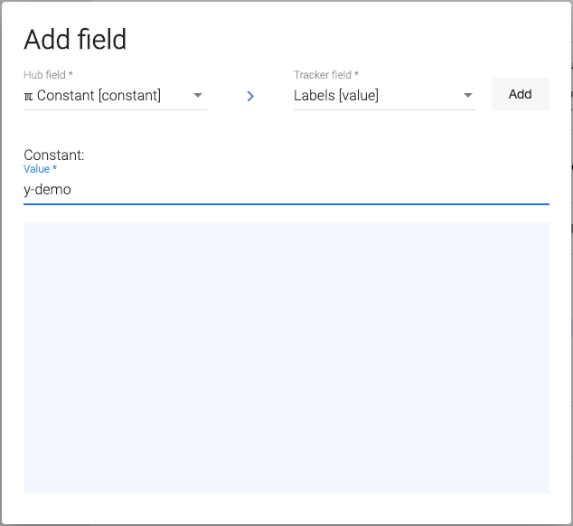
Click the +Add new button in the Filter mapping section of the Defect Tracking page.

The Add filter window appears.
Let’s assume that all security defects in Jira are labeled with the y-demo label. In this case, we need to select Labels from the Tracker field drop-down menu, "=" from the Operator drop-down menu, write y-demo in the Value field, and click the Add button on the right. The newly created appears in the Add filter window
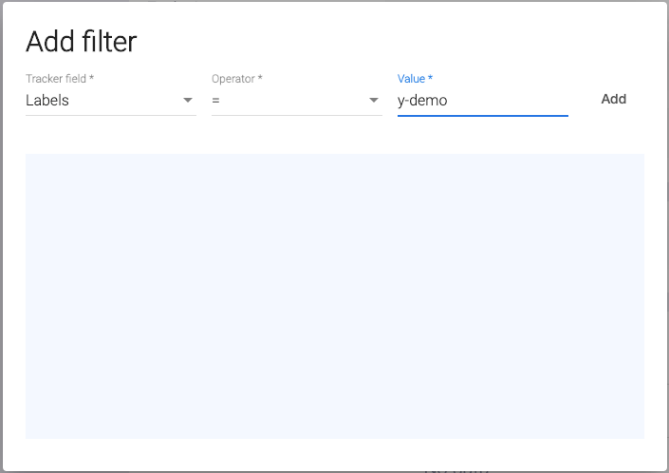
and on the Defect Tracking page.

Click the Update config button in the right upper corner of the Defect Tracking page, to save the configuration.
Defect Status Mapping Wizard
Defect Status Mapping Wizard is used to configure defect statuses mapping between Maverix and Jira.
|
If a mapping of defects for an application was configured without this wizard, the old interface will be displayed. Please use the Status mapping wizard for the configuration of new applications. |
Open the Defect Tracking page and click the Wizard button in the Status mapping wizard section. The wizard allows you to configure the mapping of defect statuses both when exporting to the defect tracking system and when importing.
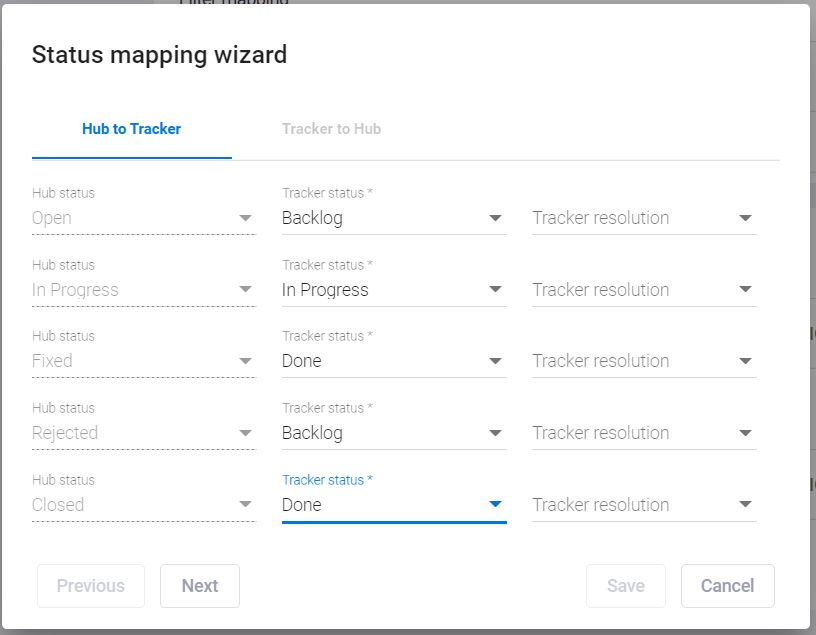
The left column displays the statuses in Maverix, and and the center column requires you to select corresponding statuses in defect tracking system. After completing the export status mapping, click the Next button to configure the import statuses.
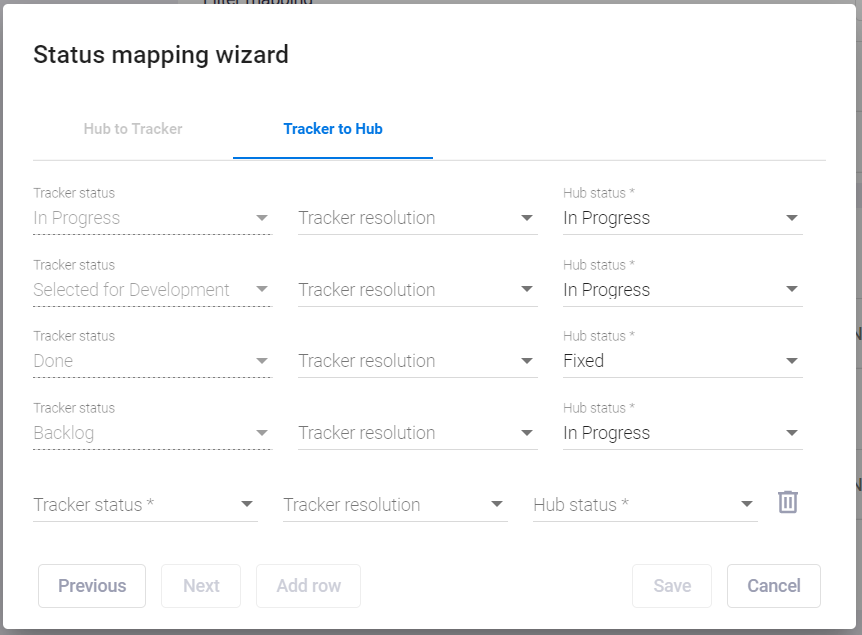
When a new status appears in the defect tracking system, you can add it to the status mapping table by clicking the Add row button. After completing all necessary settings, click the Save button. The list of all mapped statuses appears in the Status mapping wizard section. If necessary, you can start the wizard again and repeat the mapping of statuses.
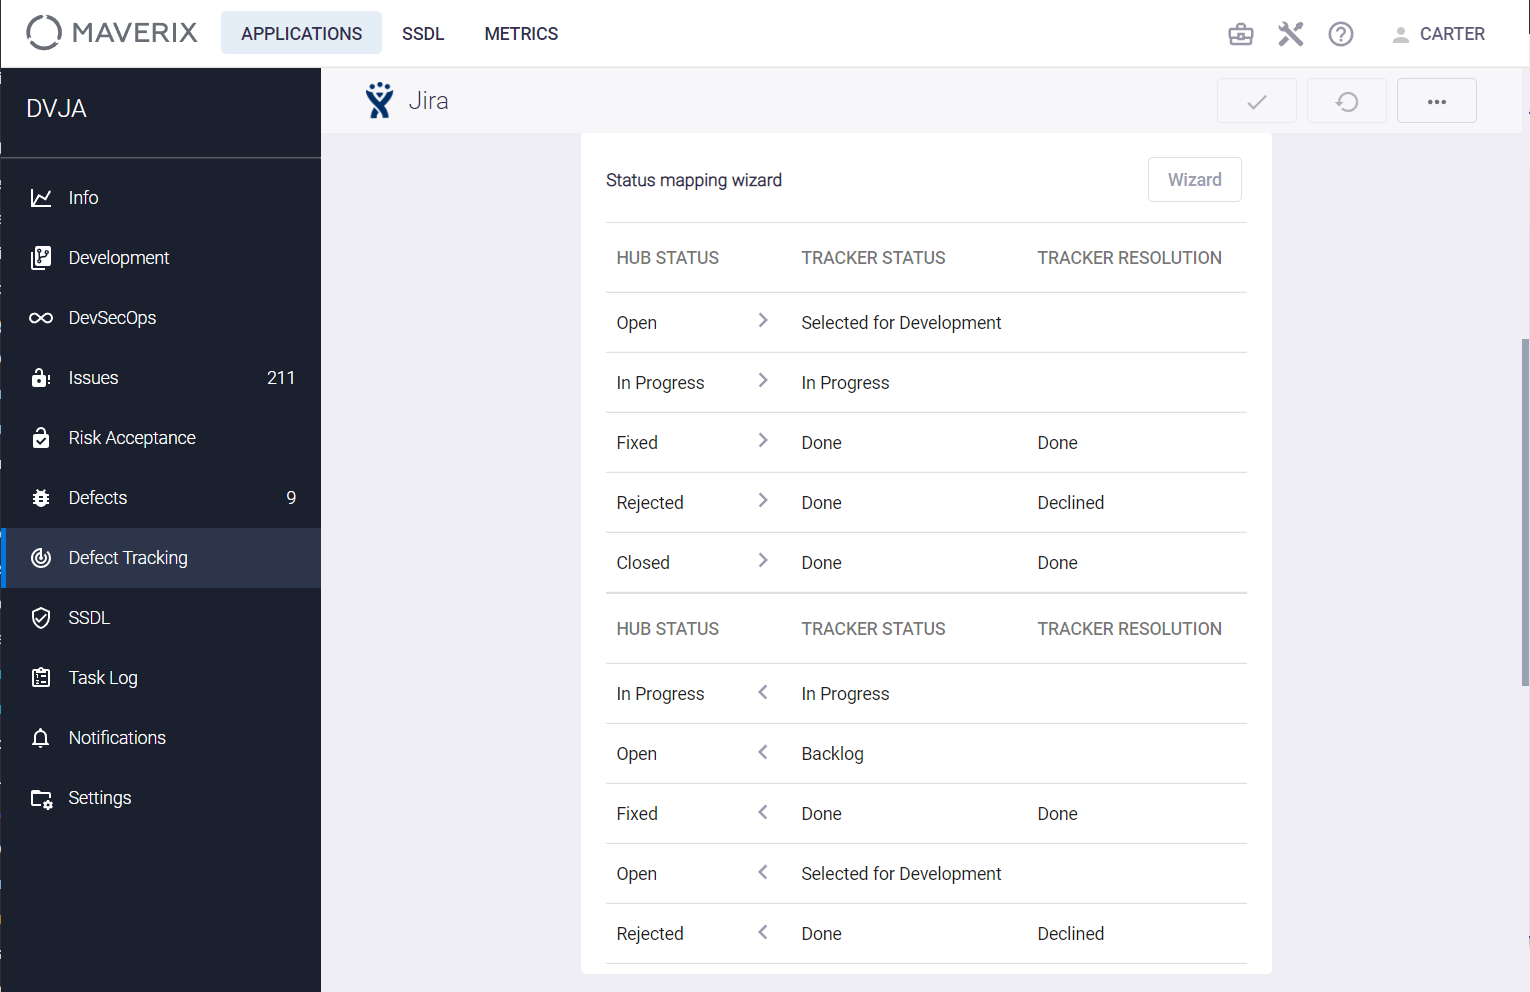
Click the Update config button in the right upper corner of the Defect Tracking page, to save the configuration.
Mapping the defect fields
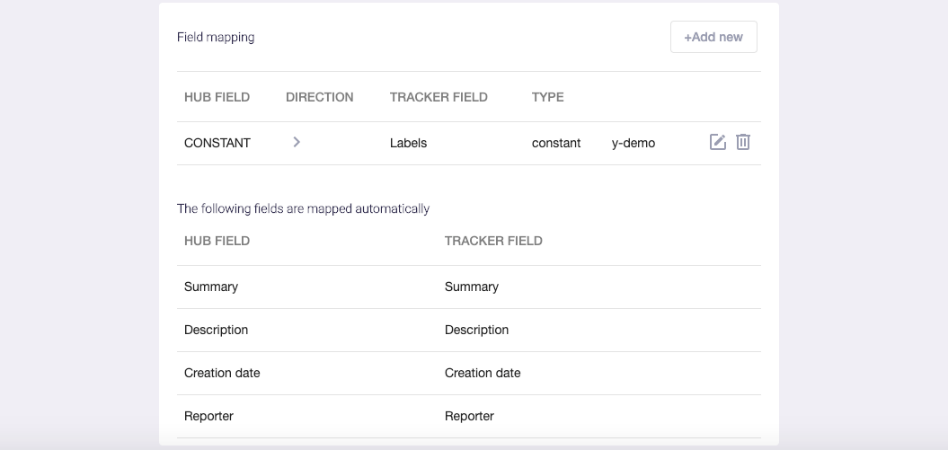
It’s important to ensure consistency and label all new security defects in Maverix with the y-demo label before synchronizing them with Jira. This action can be automatically set in the Field mapping section of the Defect Tracking page. Click the +Add new button and choose Constant from the Hub field drop-down menu, Labels [value] from the Tracker field drop-down menu, write y-demo in the Constant field, and click the Add button at the right.
This set up a new field mapping rule between Maverix and Jira. This rule is displayed in the Field mapping section of the Defect Tracking page.
Similarly, this mechanism can be used to assign an assignee for defects created in Maverix in the defect tracking system.
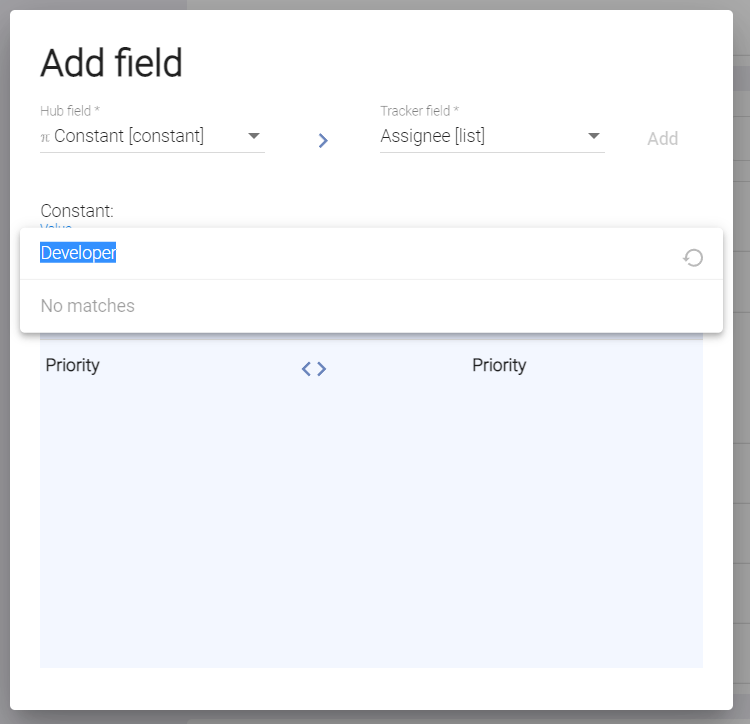
As a result of the subsequent synchronization in the task tracking system, the created defects will have the selected user in the Assignee field.
Note that there is a warning at the bottom of the Field mapping section that multiple fields in Maverix and in Jira are automatically mapped to each other by Maverix. These fields are listed in table format. All of these fields must be filled in when creating a defect in Jira. The list of "required" fields is defined for each project in Jira. If more "mandatory" fields are required for project defects in Jira, Maverix displays an appropriate warning with the name(s) of the Jira fields in the Field mapping section. These Jira fields should be mapped to Maverix fields using the field mapping mechanism.
For example, the Jira project requires defect priority. In this case, you need to map the defect priority in Maverix to the defect priority in Jira. Click the +Add new button and choose Priority [list] from the Hub field drop-down menu, Priority [list] from the Tracker field drop-down menu and click the Add button. This will create a new field mapping rule. It is shown in the Field mapping section.
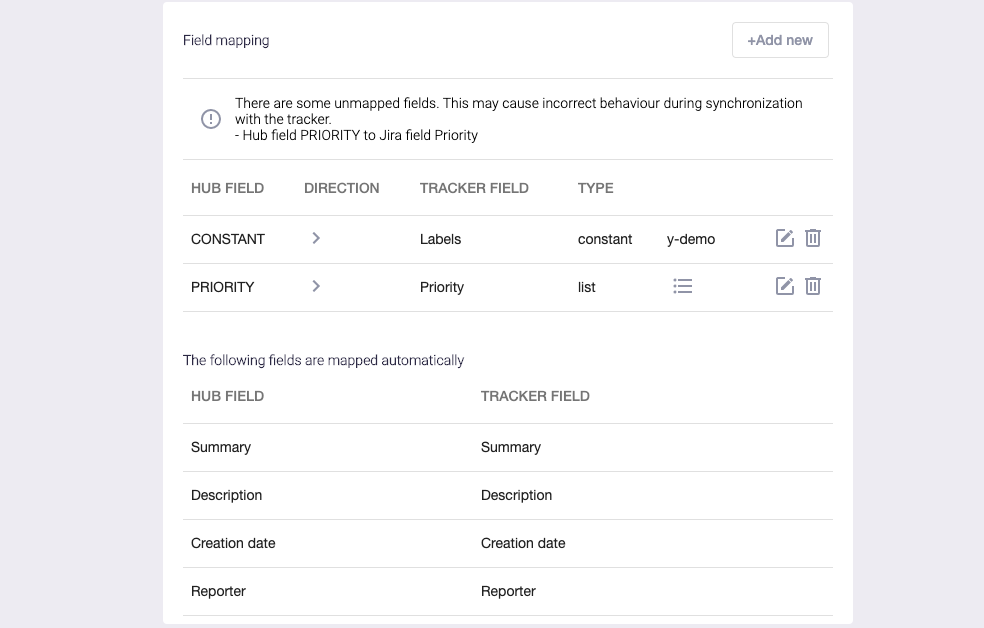
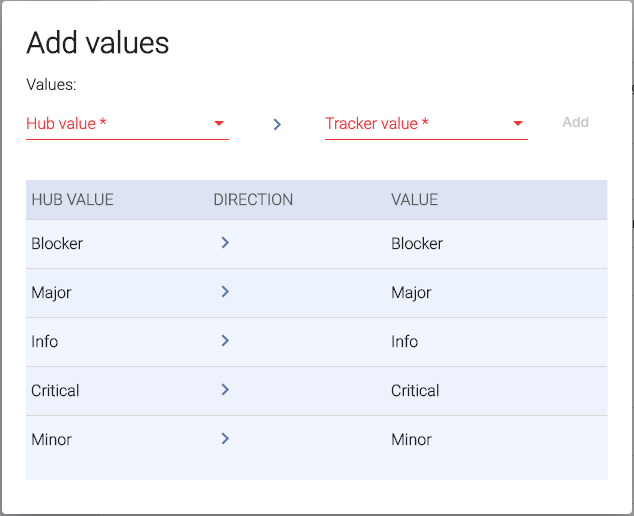
However, after creating this mapping rule, a warning appeared the Field mapping section regarding the existing unmapped fields and possible incorrect behavior when synchronizing with Jira. The defect priority lists in Maverix and Jira project are often different, so the priority values need to be mapped separately for every project. Click the Edit list elements  icon and pair Maverix defect priorities with Jira defect priorities one by one using the drop-down menus in the Add values window. Click the Add button for each pair of mapped priorities.
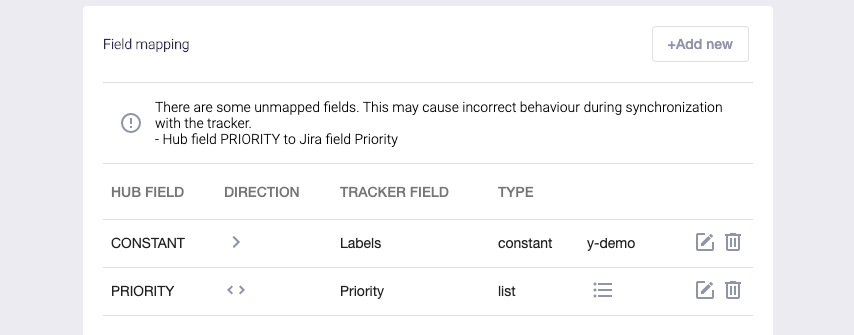
After this step, the warning in the Field mapping section should disappear.
To complete the priority mapping, you need to set a bidirectional synchronization of priorities between Maverix and Jira. There’s an indicator  in the priorities mapping string showing that sync is now set just from Maverix into Jira. Now it shows that the priority sync is only set from Maverix to Jira.
Click the edit  icon on the right to change synchronization to bidirectional. The Edit field window appears. Click the direction sign
  between the Hub field and Tracker field several times. The direction sign changes from
  to
to  and to the bidirectional sign
  .
.
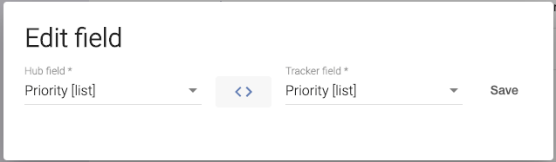
Click the Save button. The  indicator in the priorities mapping string shows that the priority sync between Maverix and Jira is now bidirectional.
Note that constants mapping should be one-directional because constants are defined once and do not change (the label mapping is an example).